
Your project workspace: a guided tour
What this does
Once your site has a first draft, the Builder opens into your project workspace. This is where you talk to the Builder to change your site, preview every page, inspect the code, see the data your site collects, and publish. This tour walks through each part.
Before you start
- You need a project that has been built at least once. If you have not built yet, start with “Create your first site with the Builder.”
Step by step
-
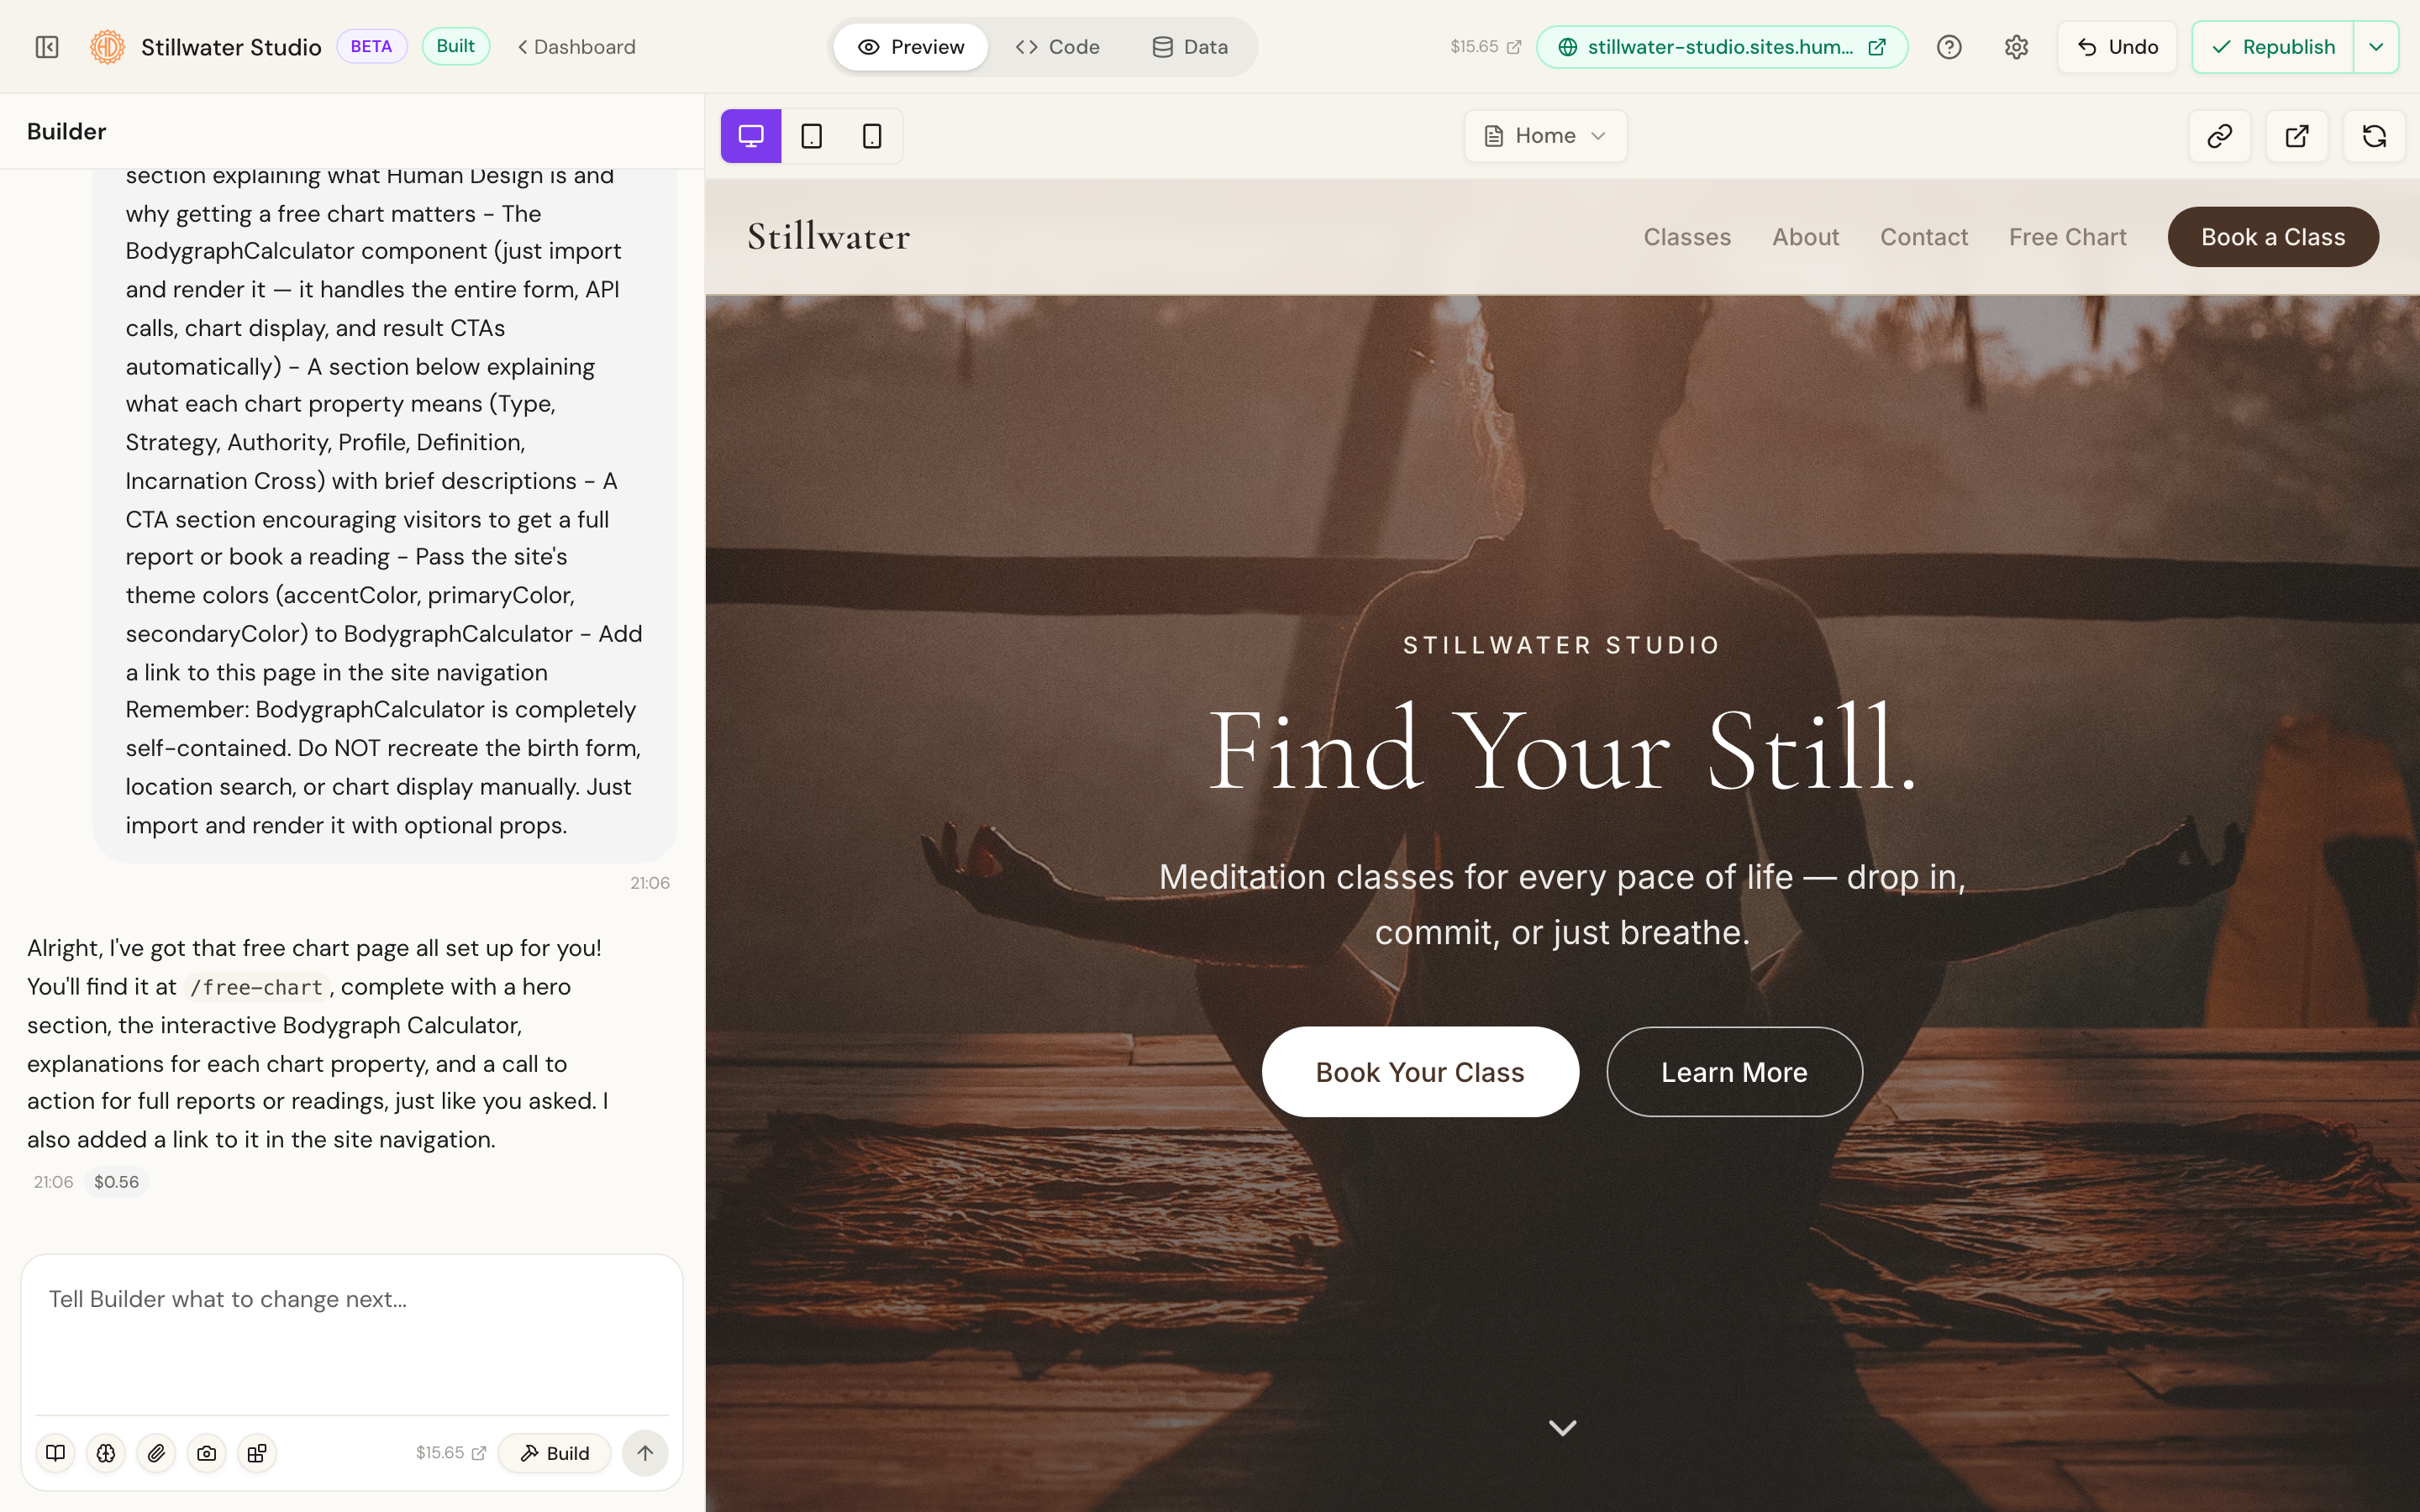
Get your bearings. The workspace has three parts: the chat panel on the left where you ask for changes, the live preview on the right, and the top bar with your tabs and the Publish button. Your site updates in place as you chat.
-
Use the top bar. The bar shows your project name, the build status, and your balance. In the centre are the Preview, Code, and Data tabs. On the right are Help, Settings, Undo, and the Publish button.

-
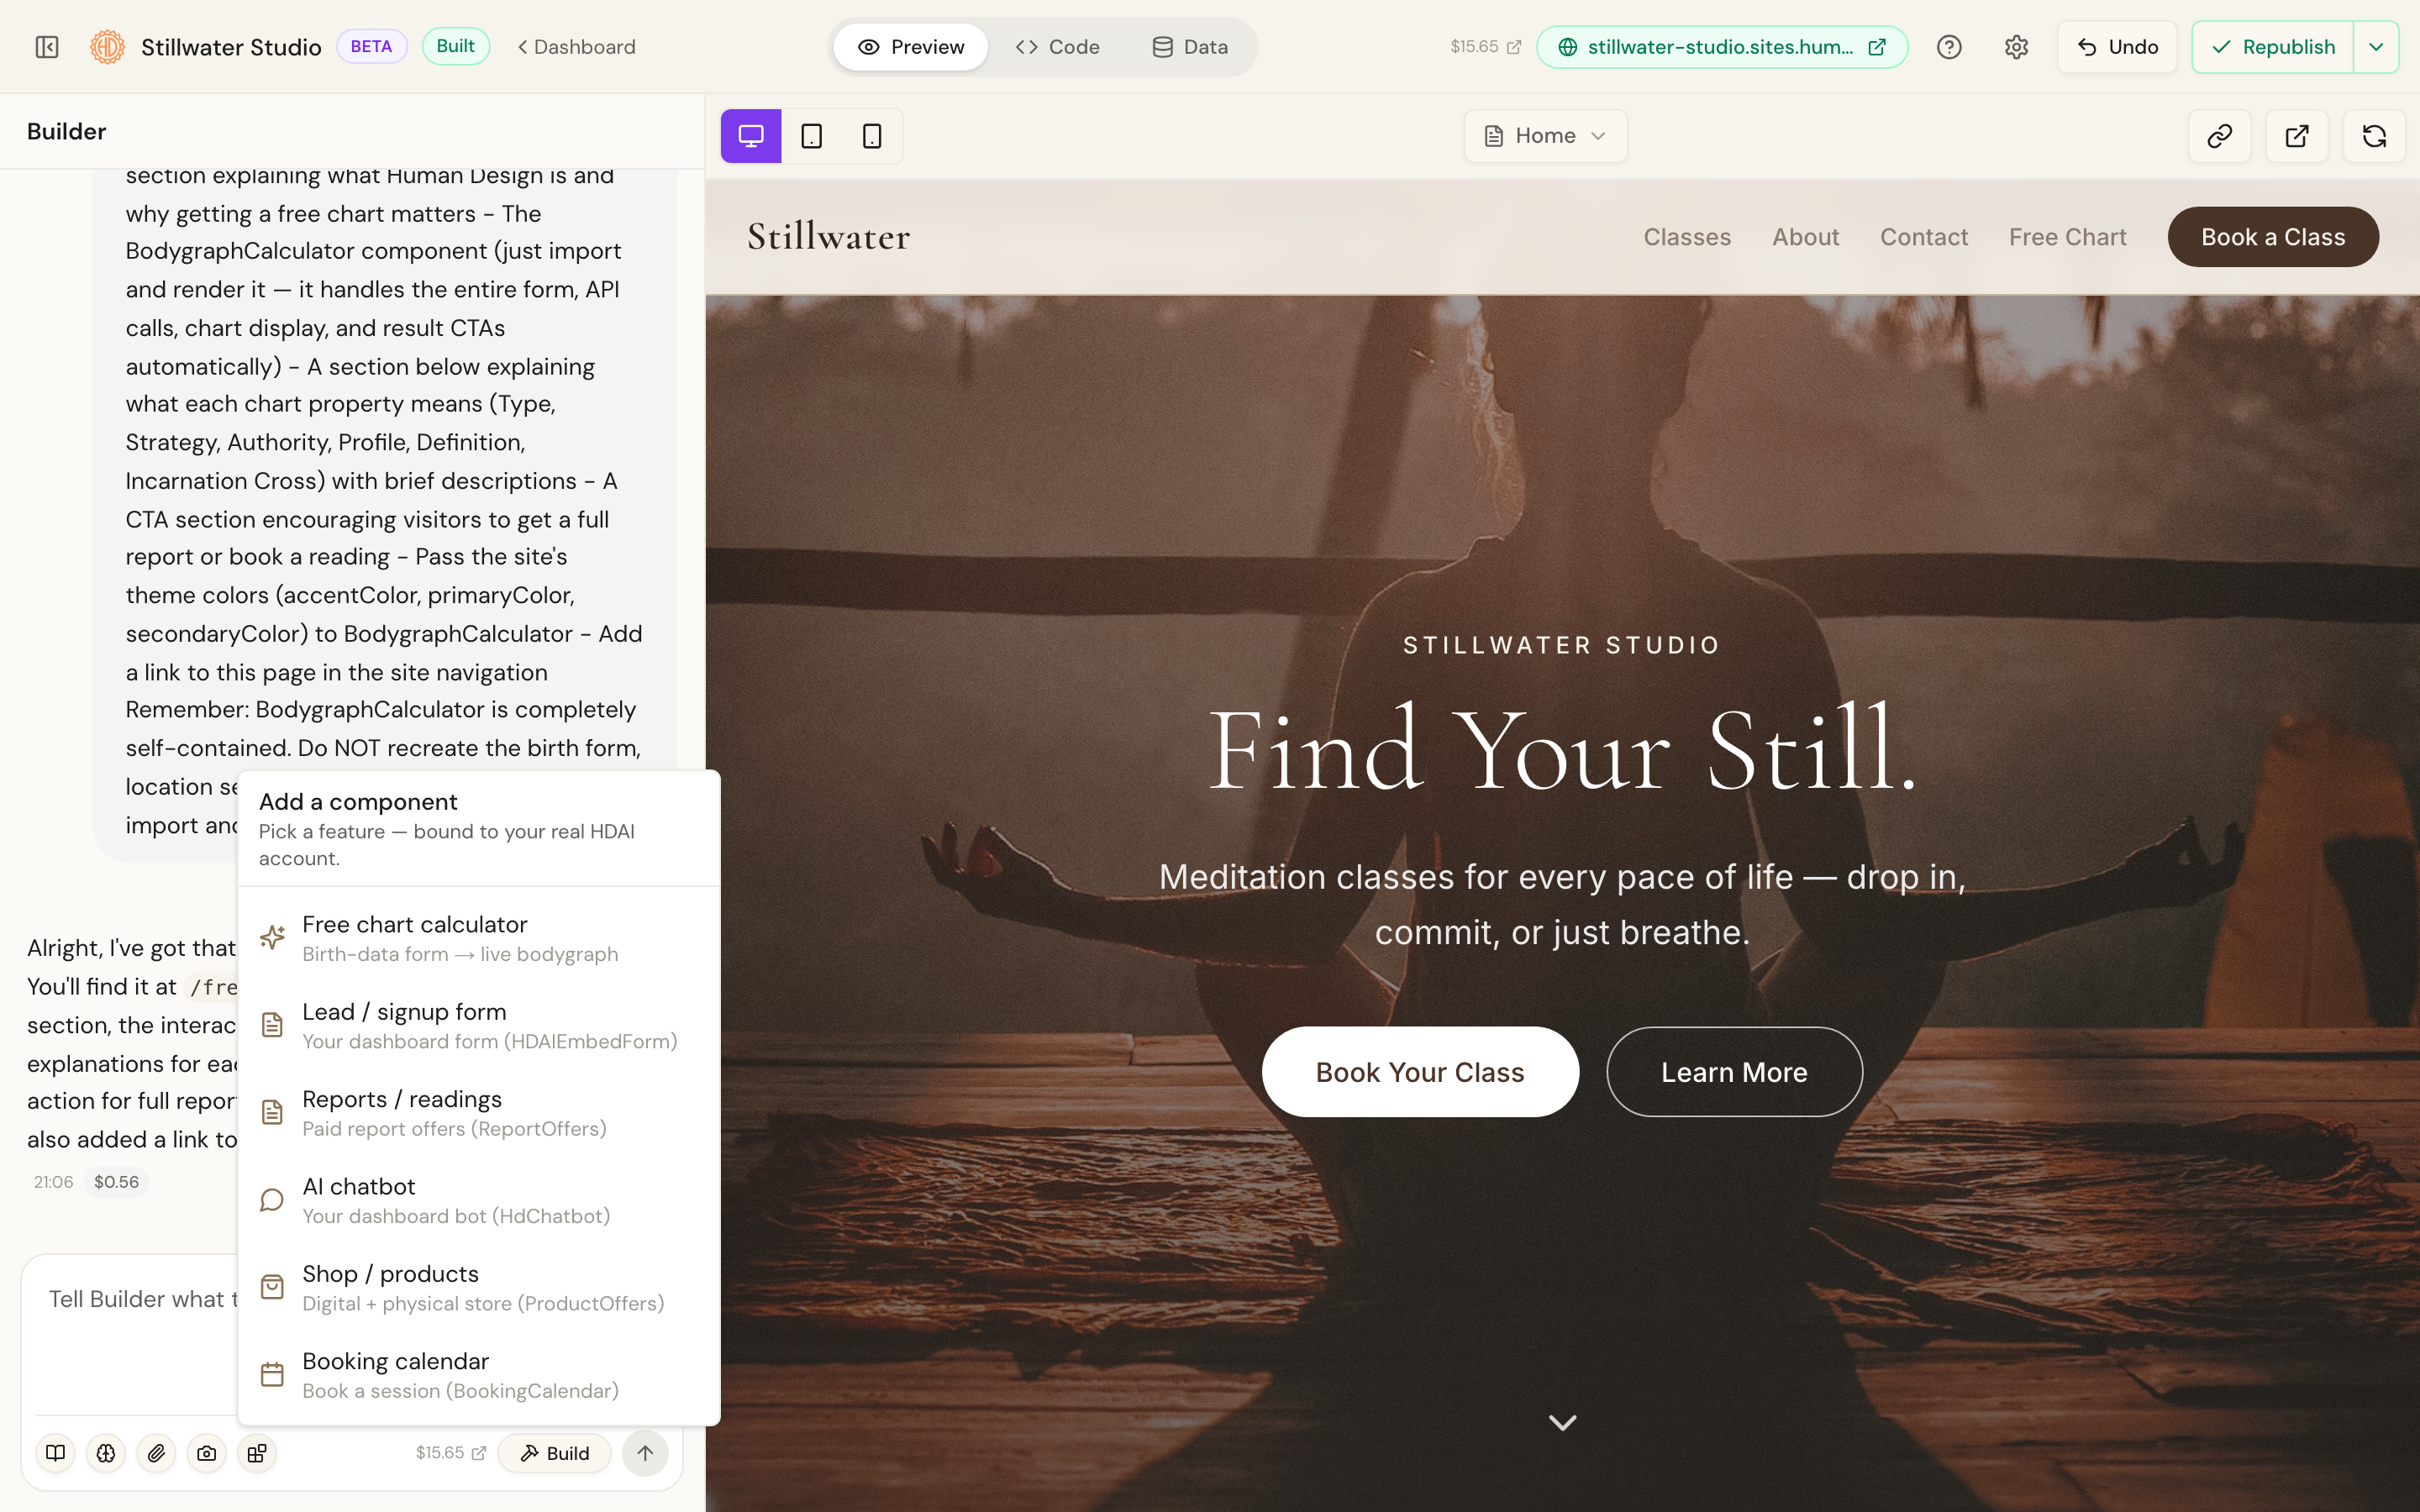
Add a Human Design component. The blocks button in the composer opens a menu of features you can drop into your site: a free chart calculator, a lead form, paid reports, an AI chatbot, a shop, a booking calendar, or a compatibility chart. Each one binds to your real HDAI account.
-
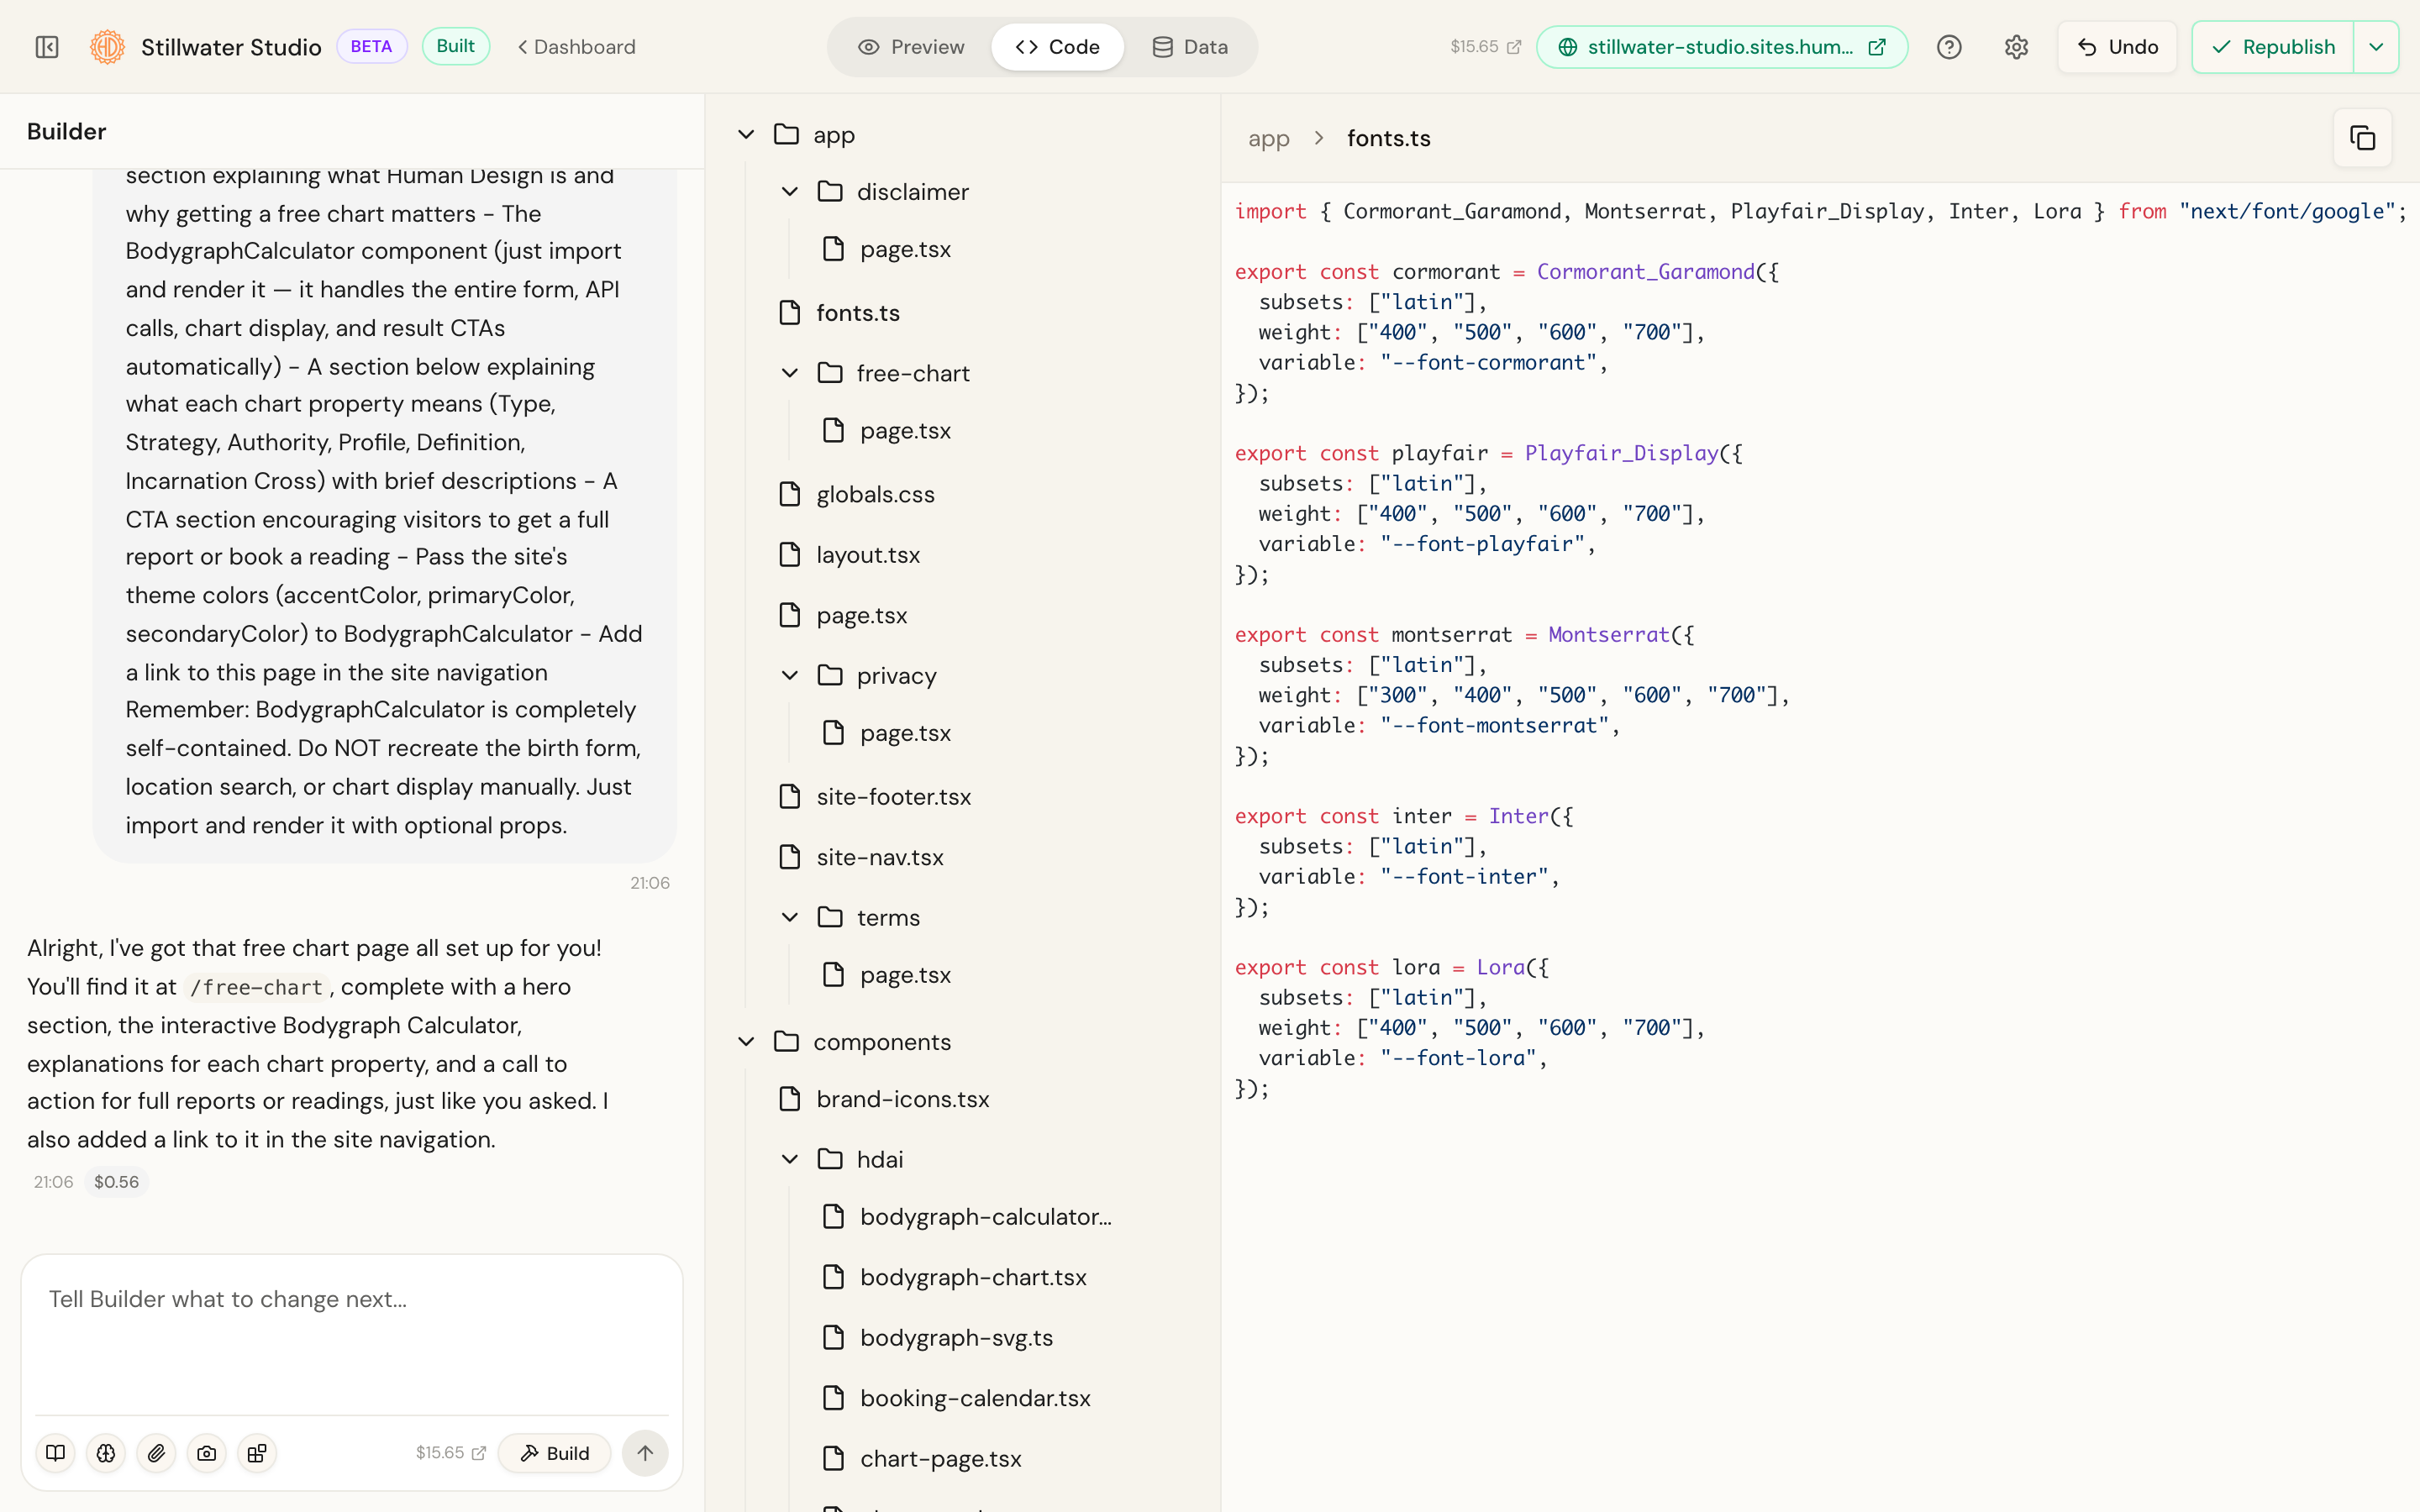
Read the code (optional). The Code tab shows the actual files the Builder wrote, so you or your developer can see exactly what powers the site.
-
See what your site collects. The Data tab gathers form submissions, chart leads, and booking requests, plus your members and a media library of images you can ask the Builder to use.
Tips
- Use the panel toggle at the far left of the top bar to collapse the chat and give the preview more room.
- The Undo button rolls back the most recent build if a change did not land the way you wanted.
- The page menu above the preview lets you jump between the pages of your site.
Related
- Add paid reports and readings to your site.
- Publish your site and connect a custom domain.